Three New Psalms Lessons Just Added!
The Psalms unit is now 15 lessons instead of 12. Please feel free to comment on the lessons as you use them so that we can use that feedback to make improvements. :-)


Wednesday, April 22, 2009

Unit 1: Lesson 10 MOSES (and the 10 plagues)

1) Welcome Activity:
  • Animals...set out some of the animals involved with the plagues: plastic animals, and finger puppets all work here.
  • Felt board... set out all the pieces involved in the Bible stories of Moses and allow the children to use the pieces to retell the story in their own words and explore what might happen next.

2) Songs: Start the Story Hour with the learning our names song. Go around the circle or table and introduce each child.

Here is a simple song to reinforce the story today: sung to the tune of "This Old Man"

  • First God sent, Plague number one,Turned the Nile into blood.All the people in Egypt were feeling pretty lowThey told Pharaoh "Let them Go!"
  • Then God sent, Plague number two, Jumping frogs all over you.All the people in Egypt were feeling pretty lowThey told Pharaoh "Let them Go!
  • Then God sent, Plague number three, Swarms of gnats from head to knee.All the people in Egypt were feeling pretty lowThey told Pharaoh "Let them Go!"
  • Then God sent, Plague number four, Filthy flies need we say more?All the people in Egypt were feeling pretty lowThey told Pharaoh "Let them Go!"
  • Then God sent, Plague number five, All the livestock up and died.All the people in Egypt were feeling pretty lowThey told Pharaoh "Let them Go!"
  • Then God sent,Plague number six,Boils and sores to make you sickAll the people in Egypt were feeling pretty low.They told Pharaoh "Let them Go!"
  • Then God sent, Plague number seven, Hail and lighting down from heaven.All the people in Egypt were feeling pretty lowThey told Pharaoh "Let them Go!"
  • Then God sent, Plague number eight, Locust came and they sure ate.All the people in Egypt were feeling pretty lowThey told Pharaoh "Let them Go!"
  • Then God sent, Plague number nine, Total darkness all the time.All the people in Egypt were feeling pretty lowThey told Pharaoh "Let them Go!"
  • Then God sent, Plague number ten, Pharaoh's son died so he gave in.All the people in Egypt were feeling pretty lowFinally Pharaoh let them go
For credits and to listen to this song, click here: http://www.kidssundayschool.com/Gradeschool/Songs/1song01.php

3) Prayer... Praise God for his power over all creation and every nation!

4) Theme: Remind the children of the theme of the unit: God works among his covenant people to prepare the world for the Savior. Hebrews 12:1&2 “Therefore, since we are surrounded
by so great a cloud of witnesses, let us… look to Jesus.” Tell them that they are going to hear a Bible Story again today that shows how God works through Moses. God shows that he is more powerful than any earthly king, and more wise than any earthly wise man.

5) Bible Story: Today’s Story is about Moses and the 10 plagues. Read pages 86-95 from the Read and Learn Bible (Scholastic).


You can use the Pharaoh, Moses, Aaron and plagues (frog and flies) pieces to help tell the story today.


6) Text: Today’s Text is: These things will happen "so that you may know there is no one like the Lord, our God." Exodus 8:10b

7) Craft:
  • The Ten Plagues (poster)… Before the lesson, take a large sheet of paper for each child and draw lines to divide into 10 even spaces. Write the names of each plague with their numbers in the spaces. Allow the children to draw/color the water into blood, hailstones and darkness. Provide small pictures for the other plagues and assist the children to glue them in the right space and color them. I used the same pictures as for the mini-book. My daughter liked having the book much better and it would be much easier to carry home from church. :-) This would make a good group craft to color together and display on the bulletin board, and you would have time to make a frog to take home! Paint the frogs, do the group poster, and then complete the frogs.
    Reminder: 1) water into blood 2) frogs 3) gnats 4) flies 5) death of all the Egyptians animals 6) sores 7) hailstones 8) locusts 9) darkness 10) death of Egyptian first born.
  • The Ten Plagues (mini-book)... use the link below to find pictures for all 10 plagues. I copied and pasted all of the pictures into a document and reduced them all so that I had 2 pictures on every page, then added the titles underneath. Email me and I can send you the document to save you some work! Cut before the lesson (I used a paper cutter to make quick work of it, cutting each page 5"x7"). During the lesson, have the children find the correct pictures and put them in order. Give them a blank sheet of paper to fold in half for the cover (again, I just cut 5X7 rectangles from construction paper). Staple the pages together and have each child write a big number "10" on the front, then glue/write the text on the front cover.. Some children may want to color the pictures right away and some will enjoy reading it to you, instead.You can do this and one frog craft together.

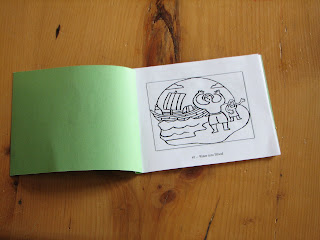
There are pictures of all 10 plagues here: http://coloringbookfun.com/moses/index.htm

  • The plague of frogs (Paper Plate). There are several ways to make really cute frogs and kids like frogs. They may not understand why this is a plague. After you have made the frogs, have the kids use them to imagine frogs in their beds, in their food, everywhere!
    Frog (Paper Plate) Paint a small paper plate green. (Note: I found green paper plates at the local Dollar$ Store) Cut out arms and legs from green paper, and a tongue from red. paper. Cut out eyes from white paper and draw black circles in the center. Have the children glue on the eyes and staple the arms and legs and tongue in place. The frogs are cute just like this, but our kids wanted spots so we glued foam shapes all over them, too. If you have time, you may want to have the kids paint their plates green early on in the session and complete the craft later on.


( I cut all the legs with the same pattern, and then tucked the front legs under the plate a bit further to make them a little shorter. This cut down my "prep" time!)

The completed frog!

  • The Plague of Frogs (Rocks) Collect enough small to medium sized rocks for all the children and paint them green before class. Cut out arms, legs and tongue from construction paper. Attach to green rock with hot glue gun if necessary. Add googly eyes. Set on paper plate with child’s name and text. Again, painting could be done by children if you divide the craft into two work sections.

Experiment with the glue you have available first to see how well the arms, legs and eyes attach as there is nothing so disappointing as a limb-less frog. :-( White glue worked, but my daughter wanted to play with the frog right away. We tried it again with a glue gun and found the results much more satisfying. On the down side, you need to do the gluing yourself.

  • Frog (Paper Bag Puppet)  Cut out smaller arms and longer legs from green construction paper.  Cut out eye shapes and bend at the bottom to make a "tab" for gluing.  Cut out a long strip of red/pink for the tongue and slightly curl the end.  Glue all the pieces to the paper bag and decorate the frog with green crayons/markers or poster paints.  My son used the green paint dabber to add spots instead and was very happy with how "froggy" this looked.    Just FYI... most 5 year olds will be able to assemble this with little assistance if you have a sample available, but 3&4 year olds will need some help.  Make sure that you have all the pieces cut out (and bagged in sets) and have an extra pair of hands around for this craft.


8) Prayer.. say the Lord's prayer together with the children.

9) Going Home: .Sing the closing together. Then, check to see if all the children have collected their crafts and coloring sheets before they go home. Say goodbye and tell them that you enjoyed learning about God together and were happy to have them today! You were, weren’t you?

10) Optional Coloring Page

Here is one option showing Moses and some of the 10 plagues:
http://www.coloring.ws/t.asp?b=m&t=http://www.coloring.ws/bible/exodus8to10.gif

Unit 1: Lesson 9 MOSES (and the burning bush)

1) Welcome Activity

2) Songs: Start the Story Hour with the learning our names song. Go around the circle or table and introduce each child.

(sing to the tune of “The More we get together”
Thank you God for (name)
For (name), for (name)
Thank you God for (name)
We’re glad (s) he is here!

3) Prayer...

4) Theme: Remind the children of the theme of the unit: God works among his covenant people to prepare the world for the Savior. Hebrews 12:1&2 “Therefore, since we are surrounded
by so great a cloud of witnesses, let us… look to Jesus.” Tell them that they are going to hear a Bible Story again today that shows how God works through Moses. God saved Moses from the anger of the Pharaoh when he was a small baby. Even though Moses thought he could NOT lead God’s people to the promised land, God uses Moses’s weaknesses to show God’s strength!

5) Bible Story: Today’s Story is about Moses, focussing on his calling. Read pages 80-85 from the Read and Learn Bible (Scholastic).

6) Text: Today’s Text is: "Say this to the people of Israel, 'I AM has sent me to you.'" Exodus 3:14b


7) Craft:
  • The Burning Bush (fingerpaint)... Print out a picture of Moses and the burning bush. Have the kids color Moses with crayons (not markers). Then, give every two children a small lid with some fingerpaint- a bit of red and a bit of yellow. Show them the bush in the picture and have them paint the red and yellow on the bush to make fire.
Here is a good picture to use. They summarize Exodus 3:14 " I am that I am", which sounds a bit awkward. I would just glue our text over top of that.
http://www.coloring.ws/t.asp?b=m&t=http://www.coloring.ws/bible/exodus3.14.gif

  • The Burning Bush (tissue paper)... Print out a picture of Moses and the burning bush. Have the kids color Moses with crayons (not markers). Then, give each child a variety of thin strips of tissue paper in red and yellow (and orange if you like, although wherever the red and yellow overlap, if will appear orange) and have them glue them on the burning bush. This is best done with white glue in cups with a q-tip as a bit of moisture will allow the colors in the tissue paper to bleed a little. (photo coming soon)

8) Closing Prayer... say the Lord's prayer together with the children

9) Going Home: Sing the closing together. Then, check to see if all the children have collected their crafts and coloring sheets before they go home. Say goodbye and tell them that you enjoyed learning about God together and were happy to have them today! You were, weren’t you?

(sung to the tune of The More we Get Together,
just like the opening song)
We love to learn together,
Together, together
We love to learn together
And give thanks to God.
Also can be sung with: “sing” or “pray” or “work”

10) Optional Coloring Pages:
Lots of nice picture relating to Moses's life can be found here:
http://coloringbookfun.com/moses/index.htm

Unit 1: Lesson 8 MOSES (as a baby)

1) Welcome Activity:

2) Songs: Start the Story Hour with the learning our names song. Go around the circle or table and introduce each child.

(sing to the tune of “The More we get together”
Thank you God for (name)
For (name), for (name)
Thank you God for (name)
We’re glad (s) he is here!

3) Prayer... Thank the Lord today for using our weaknesses for his glory.

4) Theme: Remind the children of the theme of the unit: God works among his covenant people to prepare the world for the Savior. Hebrews 12:1&2 “Therefore, since we are surrounded
by so great a cloud of witnesses, let us… look to Jesus.” Tell them that they are going to hear a Bible Story again today that shows how God works through Moses. God saved Moses from the anger of the Pharaoh when he was a small baby. Even though Moses thought he could NOT lead God’s people to the promised land, God uses Moses’s weaknesses to show God’s strength!.

5) Bible Story: Today’s Story is about Moses. Read pages 77-79 from the Read and Learn Bible (Scholastic). I have divided the story of Moses into several sections. You may choose one section to focus on each year, or you can do all the sections.

6) Text: Today’s Text is: "She named him Moses, saying, 'I drew him out of the water.'" Exodus 2:10b
.
7) Craft:
  • The Baby Moses #1….Cut a square of brown paper for each child. Fold gently lengthwise and staple the ends. Press basket down to make a nice “bottom”. Also, prepare a "baby Moses" for each child. String a large round pink/white/wooden bead onto a pink pipe cleaner so that it is about ½ way. Twist several times to make the neck. With each end of pipe cleaner, form one arm and one leg. Twist two ends together. You may draw a face with a permanent marker if you wish. We have tried to do this with the children, but it's a bit too time consumeing. At craft time, have the children glue a piece of blue tissue paper on a small paper plate to make the "river". Attach the basket to the river with a brad. Give each child a "baby" a cotton ball for a pillow and a scrap of fabric for a blanket and let them tuck the baby into the basket and float it in the river. This craft does require some extra preparation, but the results are well worth it!
  • The Baby Moses #2: Print out the template pieces and cut them all out ahead of time. Then, have the childen assemble the picture like a puzzle and glue them on to a sheet of blue construction paper. The picture can then be colored, if you like.


  • The Baby Moses #3: Print out the baby Moses template and cut out one for each child. Cut two "baskets" out of brown constuction paper and use a hole punch to make holes along the edge. Have the children lace the two sides of the baskets together with brown yarn, looping the end of the string around to make a handle. Color the baby and put him in the basket.
Template can be found here: http://www.daniellesplace.com/html/Bible%20Themes%20-%20Moses.html

* turns out this lacing is a bit difficult for 3 and 4 year olds. To make it easier, reduce the number of holes. You could also cut the yarn and stiffen one end with white glue ahead of time to make it a bit easier to poke through!


8) Closing Prayer... say the Lord's prayer together with the children

9) Going Home: Sing the closing together. Then, check to see if all the children have collected their crafts and coloring sheets before they go home. Say goodbye and tell them that you enjoyed learning about God together and were happy to have them today! You were, weren’t you?
(sung to the tune of The More we Get Together, just like the opening song)
We love to learn together,
Together, together
We love to learn together
And give thanks to God.
Also can be sung with: “sing” or “pray” or “work”


10) Optional coloring pages:
Here is a good one to use today:
http://www.coloring.ws/t.asp?b=m&t=http://www.coloring.ws/bible/babymoses.gif
Lots of good coloring pages about Moses's life can be found here:
http://coloringbookfun.com/moses/index.htm
More baby Moses:
http://www.coloringpages.net/pages/bible-24.html
http://www.coloringpages.net/pages/bible-37.html

Saturday, April 18, 2009

Paint/Glue Dabbers

How do you paint on Sunday?! Easy, use these:


I LOVE these paint dabbers from Crafty Dab. The colors are bright; they dry very quickly; they are super washable; they are sooo neat and clean that you can paint at church in your sunday clothes with NO mess. Gotta love them!

They are available at Michael's (among other places...)

You can check them out here:
http://www.daboink.com/craftydab/about_us.php
...and have a tub of baby wipes handy for a quick clean up!

They also make glue dabbers. I have tried them out with my children and find them to be as wonderful at the paint dabbers. Neat, clean and easy to apply. However, this glue is good only for paper to paper. If you are gluing on something heavier (like yarn or googly eyes) or attaching things that need to take some wear (like paper around a toilet roll to make a "puppet" toy), stick with trusty white glue. If the lid is left off by accident, you can simply rinse the dabber under warm water and ta-da - back in business! Who could ask for anything more?

Friday, April 17, 2009

Playdough... in church! Really?

Sure - even with carpet!

Commercial playdough is loaded with strong dyes that can stain carpet and clothing. Replaceing the playdough every few months really adds up and a few tiny pieces on the floor are visible from a mile away and stick like glue.

I like home-made playdough because:
  • it doesn't stain
  • it's super washable off fancy sunday outfits
  • it sweeps or vacuums up easily
  • it's non-toxic and edible (although it tastes yucky)

Here is my favorite recipe:

Measure 2 c boiling water and pour in a large bowl. Stir in 1/2 c salt until it's dissolved. Add 2 pkgs Kool-Aid* drink powder, 3 tbsp vegetable oil and 2 tbsp alum. Stir until combined. Then, adding 1/2 c flour at a time, add 2-3 cup flour to the hot water. Stir until the mixture forms a smooth ball of dough. You will need to get your hands in there at the end. Kneed the warm dough to smooth out any remaining lumps. Store in a sealed container. Refridgeration is NOT neccessary. Playdough will last 2-5 months depending upon how heavily it's used.

* it's got to be Kool-Aid! Cheap drink powders make crumbly playdough that dries out too easily.

Playdough Rules: keep it simple. Here are the rules that work for me. Repeat them to the children each time you bring out the playdough. Remember kids,

1) playdough stays ON the table 2) playdough is NOT a snack!

Welcome Activities

What you chose to do as a "Welcome" activity depends on how many children you have, and how much space you have. I suggest that you have a welcome activity(s) prepared so that the children have something to do as they come into the room. This gets your Bible Story Hour off the a good start by providing a calm, structured beginning. "Begin how you to mean to go on," the experts say.

Here are some ideas for a welcome activity:
  • coloring... have crayons/markers and paper ready on the table. Here is a good place to use an extra coloring sheet that relates to the Bible story!
  • playdough... a few lumps of playdough and some playdough "tools" get the kids to the table and busy. Just keep the tools to a minimum (think 1/child) or clean up becomes a big deal.
  • dress up box... think simple and generic here - some long multi-colored scarfs, skirts, a fishing vest and straw hats, king and queen crowns and capes, etc.
  • books... have a selection of good quality, age appropriate books on hand. Allow the children to sit and look at them, or have your assistant read aloud. We are working on a collection of Christian books for our Children's Room.
  • toys... this can work really well, but think "quiet play" and plan for about 1-2/child. You don't want the kids to be running around whooping it up so that you start your lesson with hyper children and a big mess. A small bucket full of animals can keep a group of 3-5 year olds occupied until you are ready to begin the lesson. In our Room, we have a bucket of animals, a collection of multicultural people, a bin of wooden blocks and a bin of wooden puzzles and other simple games.
  • puppets... small children learn with their ears, eyes, noses and especially with their HANDS! Puppets are an excellent way to make the stories real and memorable for little people. A collection of animals is great - think sheep, cow, camel, donkey, frog, bird, etc. Make people puppets that are not tied down to just one bible character (for example, make a boy, young man and an old man, rather than Samuel, Jonathan and Noah). Don't forget to include a king, queen and soldiers!
  • felt board... cover a tack board with inexpensive felt. Laminate pictures (even coloring book pictures, carefully colored work well) and add some adhesive velcro to the back. Set out the pictures that connect with the day's story and allow the children to play with them on the felt board.
  • musical instruments... a collection of simple, durable instruments goes a long way. Think baby food jars "shakers" with rice or bean, strings of bells, sandpaper blocks, tamborines, and "clappers".

If you have the room for more than one activity, set up a table with some books or coloring and a bucket of toys for play. You can use these same activities at the end of the lesson if you finish early and want to avoid "run around and scream" time. Parents love to pick up their children from a busy room filled with the murmer of happy children.

A small CD player with a CD of children's songs/hymns playing in the background sets a similar happy atmosphere.

Tuesday, April 7, 2009

Unit 1: Lesson 7 JOSEPH

1) Welcome

2) Songs: Start the Story Hour with the learning our names song. Go around the circle or table and introduce each child.

(sing to the tune of “The More we get together”)
Thank you God for (name)
For (name), for (name)
Thank you God for (name)
We’re glad (s) he is here!

3) Prayer... Thank God that he is in control of everything. Thank him for guiding our way.

4) Theme: Remind the children of the theme of the unit, that God works among his covenant people to prepare the world for the Savior. Hebrews 12:1&2 “Therefore, since we are surrounded by so great a cloud of witnesses, let us… look to Jesus.” Tell them that they are going to hear a Bible Story again today that shows that theme. Joseph’s brothers were doing wrong to Joseph by selling him into slavery, but God had a plan to save all the Israelite from the famine using Joseph in Egypt.

5) Bible Story: Today’s Story is about Joseph based on Genesis 37-45. Read pages 65-76 from the Read and Learn Bible (Scholastic).

6) Text: Today’s Text is: Genesis 45:8 “So it was not you who sent me here, but God.”

7) Craft:

  • Joseph’s Many Colored Coat… cut out the shape of a coat from construction paper. Give the children crayons/markers and colored paper scraps, scissors and glue and encourage them to decorate Joseph’s coat in many colors. They may glue the finished coat onto a sheet of white paper with the text on the bottom or you can simple write the text on the back of the coat. Materials Required: construction paper, bag of colored scraps. white paper, crayons, markers, glue. Alternatively, provide them with a coloring page of Joseph and have them decorate this coat with all the colored scraps.
  • This picture is good for smaller kids at the coat already has lots of pattern. This removes the pressure to cover the whole coat with colors! A simpler picture may work better if your group has more older children who might like to make up their own patterned coats.
  • Joseph's Coat (painting)... if you have invested in paint dabbers (see tip on "Noah"), then this would be a great time to bring them out. Let the children fill in the coat with lots of dabs of paint in many different colors. Kids can easily get carried away with paint dabbers, so emphasize that the paint is supposed to go ONLY on his coat!
  • The COAT on the left is just squares of construction paper. If you have fabric scraps, that can look really good too. The COAT on the right is painted with paint dabbers - by my 3 year old... I did the coloring, though :-)
  • Joseph’s Dreams… draw a line down the center of a piece of construction paper to divide the paper into two. Cut out the shapes: a person for Joseph, sheaves of wheat, the sun, moons and stars. Allow the children to choose and glue the shapes to show Joseph’s two dreams. You may want to prepare a sample for them to copy. If you can find them, use start stickers instead of paper cut outs. Older children may want to draw Joseph rather than glue on the paper person. Materials Required: construction paper, Joseph cut out shapes, star stickers, sun and moon cut out shapes, glue, crayons, markers (photos coming soon)
8) Closing Prayer: say the Lord's Prayer together with the children.

9) Going Home: Sing the closing together. Then, check to see if all the children have collected their crafts and coloring sheets before they go home. Say goodbye and tell them that you enjoyed learning about God together and were happy to have them today! You were, weren’t you?
(sung to the tune of The More we Get Together,
just like the opening song)
We love to learn together,
Together, together
We love to learn together
And give thanks to God.
Also can be sung with: “sing” or “pray” or “work”

Unit 1: Lesson 6 JACOB AND ESAU

1) Welcome:
2) Songs: Start the Story Hour with the learning our names song. Go around the circle or table and introduce each child.

If you are the musical type, you may want to learn this song and teach it to the children! Click here to listen. The full lyrics and score are available at http://www.gardenofpraise.com/
http://gardenofpraise.com/audiofiles/jacosong-1.wma
Here is a neat song to help us learn the names of Jacob's sons:

Sons of Jacob (to the tune of "Ten Little Indians")
Reuben, Simeon, Levi, Judah,
Issachar, Zebulun, Dan and Naphtali,
Gad and Asher, Joseph, Benjamin
- These are the sons of Jacob.

3) Prayer: Ask God to use our weaknesses to show how strong HE is!

4) Theme: Remind the children of the theme of the unit: God works among his covenant people to prepare the world for the Savior. Hebrews 12:1&2 “Therefore, since we are surrounded by so great a cloud of witnesses, let us… look to Jesus.” Tell them that they are going to hear a Bible Story again today that shows how God works through two brothers, Jacob and Esau. God uses the brother’s strengths as well as their weaknesses to show God’s power and might.

5) Bible Story: Today’s Story is about Jacob and Esau. Read pages 50-62 from the Read and Learn Bible (Scholastic).

6) Text: Today’s Text is: The Lord said to Rebekah, “and two peoples, born of you, shall be divided; The one shall be stronger than the other, The elder shall serve the younger.” Genesis 25:23

7) Craft:
Birthright Sold for a bowl of Soup- Clay Craft. Prepare “air dry” clay ahead of time, if you wish, or use plasticine. Make enough so that each child can make a small pot. Bring a small round cup and a rolling pin to cut out standard size bases for all the pots. You may wish to prepare a sample a few days ahead of time. At craft time, help the children roll a flat section and cut out bases for each child. Divide remaining dough into even lumps for each child and demonstrate how to roll a “snake” in your hands. Coil the length of clay around the base of the pot to make an old fashioned soup pot. Clay will dry after it has gone home. Send home “pots” in a Styrofoam bowl/plate with today’s text attached to it. If you like, you could even give the children some red lentils to put in their pots! We have tried this with a variety of different "clays" and find that plasticine (even the inexpensive kind that you can buy at a dollar store) is the easiest for kids to work with and provides the most satisfying results.

  • Same and Different….cut out the shape of a man (2 for each child and have them glue one one side of a piece of construction paper. Have the children decorate the shapes with crayons, markers and scraps of fabric to show how the two brothers are same and different. Provide scraps of fake fur if possible! Write “Esau” and “Jacob” on the two sides of each child’s sheet. If you have time, also write down a few words to describe each brother using the child’s ideas.


8) Closing Prayer: say the Lord's Prayer together with the children.

9) Going Home: Sing the closing together. Then, check to see if all the children have collected their crafts and coloring sheets before they go home. Say goodbye and tell them that you enjoyed learning about God together and were happy to have them today! You were, weren’t you?
Closing song:
(sung to the tune of The More we Get Together,
just like the opening song)

We love to learn together,
Together, together
We love to learn together
And give thanks to God.

Also can be sung with: “sing” or “pray” or “work”

10) Optional Coloring Pages (available for free at http://www.dltk-bible.com/)

Monday, April 6, 2009

Unit 1: Lesson 5 ISAAC

1) Welcome

2) Songs: Start the Story Hour with the learning our names song. Go around the circle or table and introduce each child.

(sing to the tune of “The More we get together”
Thank you God for (name)
For (name), for (name)
Thank you God for (name)
We’re glad (s) he is here!

3) Prayer:

4) Theme: Remind the children of the theme of the unit: God works among his covenant people to prepare the world for the Savior. Hebrews 12:1&2 “Therefore, since we are surrounded
by so great a cloud of witnesses, let us… look to Jesus.” Tell them that they are going to hear a Bible Story again today that shows how God works through Isaac. God took care of his people by making sure that Isaac had a wife who believed in the Lord, so that they could have children who served the Lord, too. Isaac’s son, Jacob would have 12 sons who became the 12 tribes of Israel.

5) Bible Story: Today’s Story is about Isaac and Rebekah. Read pages 39-49 from the Read and Learn Bible (Scholastic). If you are comfortable, you can tell the story about how Abraham was tested and God asked him to sacrifice Isaac. This story is not in the Read and Learn Bible so you will need to tell it on your own.

6) Text: Today’s Text is: “This is from the Lord… here is Rebekah. Let her become Isaac’s wife.” Genesis 24:50-51

7) Craft:

  • Camel Sand Craft… color a picture of a camel (or camel and rider) to look like desert sand: use brown crayons, peeled and along their sides to rub the picture. Put sand paper underneath (medium grit is probably easiest to rub) or allow the children to experiment with various grits in smaller squares. If using the picture with the rider, you may add stickers or “jewels” to the camel blanket.
camel (no rider)


I added a water jar to the finished picture. Notice the different textures on the close-up view.

* If you chose to tell the story of God asking Abraham to sacrifice Isaac, then we suggest Genesis 22:12b “Now I know that you fear God, because you have not withheld from me your son, your only son.”
  • Egg Carton Lamb Craft... Fold a small piece of black construction paper and cut out an ear shapes (basically just a U). The fact that you folded first will give you two matching ears. Cut out one of the cups from the Styrofoam egg carton. Glue two or three cotton balls onto the cup. Glue on the black ears. You can also cut out small black eyes or use googly eyes and a triangle nose, but for really young kids, these pieces will be too fussy for them to work with. Materials needed: glue, scissors, cotton balls, black construction paper, Styrofoam egg carton
  • Paper Lamb Craft... Print out the template - the one at www.first-school.ws/t/cplamb.htm is the one I used for the sample. Put dabs of glue on the lamb and add cotton balls. Pull the cotton apart first or the finished lamb will be very heavy. I suggest cutting this out and gluing it on to a sheet of construction paper so that it is a little more sturdy. If your group has a lot of little ones who are not too handy with scissors yet, you can have them work on a coloring sheet or play with playdough while you do the cutting and gluing. Materials needed: lamb template, paper, cotton balls, glue
    * variations of this craft are done for Christmas and Psalm 23 as well, so check which have been done lately.

8)Closing Prayer... say the Lord's prayer together with the children.

9)Going Home: At 11:15 round up all the children around the table or sit in a circle again. Sing the closing together. Then, check to see if all the children have collected their crafts and coloring sheets before they go home. Say goodbye and tell them that you enjoyed learning about God together and were happy to have them today! You were, weren’t you?
(sung to the tune of The More we Get Together,
just like the opening song)
We love to learn together,
Together, together
We love to learn together
And give thanks to God.
Also can be sung with: “sing” or “pray” or “work”
10) Optional Coloring Pages...

Unit 1: Lesson 4 ABRAHAM

1) Welcome:

2) Songs: Start the Story Hour with the learning our names song. Go around the circle or table and introduce each child.

Here is a cute little song to reinforce the idea of stars in the sky: (sing like Twinkle Twinkle)

Twinkle twinkle little star, How I wonder what you are.
Up above the world so high, Like a diamond in the night.
Twinkle twinkle little star, How I wonder what you are.
Twinkle twinkle little star How I wonder what you are
God has put you in the sky And sometimes I wonder why
But it’s good t shine up there You remind me of God's Care.


3) Prayer... Ask God to work the Holy Spirit in our hearts to give us the faith to move mountains.

4) Theme: Remind the children of the theme of the unit: God works among his covenant people to prepare the world for the Savior. Hebrews 12:1&2 “Therefore, since we are surrounded
by so great a cloud of witnesses, let us… look to Jesus.” Today we are going to hear a story about Abraham. Abraham and his wife Sarah had no children, but God promised to make their descendants as many as the stars in the sky. How would God do this? Abraham had to trust in God.

5) Bible Story: Today’s Story is "Abraham" . Read pages 33-38 (R 37-42) from the Read and Learn Bible (Scholastic).

6) Text: Today’s Text is: Genesis 15:5 "...Look towards the heaven, and number the starts, if you are able to number them... So shall your descendants be."

7) Crafts:
  • Number the stars... Here is a simple craft that small children love to do. Give each child a sheet of black or dark blue constructions paper for the "sky." Provide lots of star stickers and allow the kids to put as many stars in the sky as they like. Then, challenge the children to count the stars! Or you can use the coloring page below, and do the same idea... lots and lots of stars. Most dollar stores sell packs of about 500 star stickers in gold, silver, red and blue. Worth every penny. If you have a star punch, you could punch out stars from colored paper, for some variety.


8) Closing Prayer... say the Lord's Prayer together with the children.

9) Going Home: Sing the closing together. Then, check to see if all the children have collected their crafts and coloring sheets before they go home. Say goodbye and tell them that you enjoyed learning about God together and were happy to have them today! You were, weren’t you?

10) Optional Coloring Pages:
check out www.coloring.ws/abraham.htm for some free coloring pages

Unit 1: Lesson 3 NOAH

1) Welcome Activity:
       Today is all about animals - two by two.  You can bring out plastic toy animals, animals on a felt board, animal puzzles, playdough with animal shaped cutters or whatever other animal activity you have on hand.


2) Songs: Start the Story Hour with the Welcome Song. Go around the circle or table and introduce each child.

Here is a fun song to sing about Noah's ark: (tune is Old MacDonald)
Good old Noah built an ark,Like God told him toAnd on that ark he took two ______,Like God told him to,With a _______ here and a _______ there,Good old Noah built an ark,Like God told him to.
Do as many verses as you'd like (either let the children pick the animals or use a flip chart or flash cards) and then at the end instead of singing "Good old Noah built an ark, Like God told him to" sing: “And if you do what God says to do, He will bless you, too.”

3) Prayer... Pray for the washing away of sins today. Thank God for his mercy to his people.

4) Theme: Remind the children of the theme of the unit: God works among his covenant people to prepare the world for the Savior. Hebrews 12:1&2 “Therefore, since we are surrounded
by so great a cloud of witnesses, let us… look to Jesus.” Tell them that they are going to hear a Bible Story again today that shows how God works through Noah. The people God had made had forgotten him already and were not doing God’s will. God used Noah and his family to save the animals and to fill the world with people again after the flood.

5) Bible Story:Today’s Story is "The Flood and the Rainbow," about Noah from the Read and Learn Bible (Scholastic).

6) Text: Today’s Text is: “And He set the rainbow in the sky” Gen 9:13a

7) Crafts:
  • Noah’s Ark Picture #1... Photocopy template of Ark and cut out (do this beforehand). Glue Ark on construction paper. Have children colour Ark with crayons, glue on tissue paper for water, glue on cotton balls for clouds, glue on animal crackers and draw a rainbow.
    Glue print out of text on top of page.
    Materials:Photocopies of Ark, cotton balls, Construction Paper, crayons,Tissue Paper, animal crackers, Glue, scissors. If you have children with allergies, you can use stickers of animals instead of the animal crackers. I used the ark template found at www dot dlkt-bible dot com.
  • Noah's Ark Picture #2... Copy the ark template from http://www.dltk-bible.com/ into a document and shrink and copy it so that you have four on a page. Print onto heavy brown paper, like cardstock. Cut out the arks ahead of time. Cut out two strips of blue wave for each child. During the lesson, have the children glue on the two strips of wave, then glue on clouds in the sky. Then, attach an ark in the water with a brad. Kids love to make the ark "sail" in the water. Put a tiny bit of washable blue paint on a small lid (one for every two kids) and give each child a q-tip. Demonstrate dipping the q-tip in the paint and dotting it on the picture to make drops of rain, then let the kids go to it!

  • Noah’s Ark Door Hanger... Make copies of the template of Ark with animals and cut out (do this beforehand). Glue on construction paper and trim around the picture. Punch holes with hole punch in the designated spots. Have children colour the ark, then have children sew with yarn around the Ark and tie up at the top, leaving enough slack so that it can be hung on a doorknob. If there is time, several colours of yarn can be used so that it looks like a rainbow.
    Materials: Photocopies of Ark, crayons, Construction Paper, yarn, Glue, scissors. (photo coming soon)
  • Handprint Rainbow Craft (group craft)
    Trace each child’s hand on a different colour piece of paper. Cut out and glue the hands onto one large piece of paper in the shape of a rainbow Materials: Construction Paper (variety of colours), scissors, Large piece of white paper, glue. This is a great second craft that can be used to decorate a bulletin board!
  • Noah's Ark Activity.... Make a circle with all the children. Pick two to be the first "animals" in the Ark. They get in the middle of the circle. Choose an animal with a sound (like a pig) or allow the two in the middle to pick an animal. They pretend to be that animal and act like them or make sounds like the animals or both.
    The other children circle around singing: Chorus: Old Noah in the Ark, Old Noah in the Ark, High-Ho! the Dairy-O, Old Noah in the Ark! Verse One: Two (pigs) were in the Ark (oink, oink), Two (pigs) were in the Ark (oink, oink), High-Ho! the Dairy-O, Two (pigs) were in the Ark!
8)Closing Prayer... say the Lord's prayer together

9) Going Home: At the end of the lesson, round up all the children around the table or sit in a circle again. Sing the closing together. Then, check to see if all the children have collected their crafts and coloring sheets before they go home. Say goodbye and tell them that you enjoyed learning about God together and were happy to have them today! You were, weren’t you?

10) Optional Coloring Sheets
you can check out www.coloring.ws/noah.htm for some free coloring pages

Unit 1: Lesson 2 ADAM AND EVE

1) Welcome

2) Songs Start the Story Hour with the learning our names song. Go around the circle or table and introduce each child, as you sing.


Here is a song about today's story, set to the tune of "Farmer in the Dell"
  • God made the universe God made the universe He saw that it was good, Amen God made the universe
  • Then God created man Then God created man He made Adam in His likeness Yes God created man
  • God made the woman Eve God made the woman Eve He took a rib from Adam’s side God made the woman Eve
  • God placed them in Eden God placed them in Eden He said all this is yours for good God placed them in Eden
  • But please don’t touch the tree But please don’t touch the tree Just please don’t eat that fruit you see Oh, please don’t touch that tree
  • A serpent slithered in A serpent slithered in He talked to Eve about the fruit A serpent slithered in
  • Eve ate forbidden fruit Eve ate forbidden fruit She shared the fruit with her husband They ate forbidden fruit
  • God was very sadGod was very sadHe told them they would have to leaveOh, God was very sad.
  • And that’s how things went wrong And that’s how things went wrong Oh that is why life became so hard Yes, that’s how things went wrong.
3) Prayer... Praise God for the wonderful way he made us today. Ask for forgiveness for the hardness of our hearts. Thank God for sending a Saviour to make our hearts new again.

4) Theme: Talk to the children about the theme of the unit: God works among his covenant people to prepare the world for the Savior. Hebrews 12:1&2 “Therefore, since we are surrounded by so great a cloud of witnesses, let us… look to Jesus.” Tell them that they are going to hear a Bible Story today that shows how God works through Adam and Eve. God created a perfect world and Adam and Eve chose to disobey God. God’s justice required punishment and they could not save themselves. Adam and Eve needed a SAVIOR! All year, the children will learn about how God uses the men and women of the Bible to prepare the world for Jesus our Savior.

5) Bible Story: Today’s Story is "God's Garden," about Adam and Eve. Read pages 9-19 (R 14-22) from the Read and Learn Bible (Scholastic).

6) Text: Genesis 2:17 "but of the tree of the knowledge of good and evil you shall not eat, for in the day that you eat of it you shall die."

7) Crafts:


  • Eve and the Snake... Print out the picture and have the children color the tree, Eve and the snake. Cut a slit in the tree along the marked line. Cut out the snake and show the children how to pop it out of the tree so that it can talk to Eve.  (there's a great template here)

Here are the two pieces. You may need to cut out the snake for the younger children (this can be done ahead of time, too)
    The children love to pop the snake in and out of the tree and pretend it is talking to Eve.
  • Adam and Eve Story Book... print out the pages of the book, cut them and assemble them ahead of time. Have the children color the pictures. Read the story together. This is an excellent "back-up" craft to have on hand for kids who work quickly, or for the older ones to do while the little ones are busy. Kids love to have a book to take home and read with their families, too.


One can be found at www.dltk-teach/minibooks/eden/index Here is another: www.christianpreschoolprintables.com/files/minibooks/minibookAdamEve (available in black and white or color)

8) Closing Prayer: say the Lord's Prayer together with the children

9) Going home: Sing the closing together. Then, check to see if all the children have collected their crafts and coloring sheets before they go home. Say goodbye and tell them that you enjoyed learning about God together and were happy to have them today! You were, weren’t you?

10) Optional Coloring Pages:
check out www.coloring.ws/adamandeve.htm for some free coloring pages


Wednesday, April 1, 2009

Unit 1: Lesson 1 CREATION Mini-Unit

NOTE: Several people have commented that one lesson for such a special event like creation feels far too rushed, and they would like to see the lesson broken into several segments.  I will keep the "general" lesson on creation, and here are some additional ideas for teaching Creation as a mini-unit of  5 lessons. 

 - - - - - - - - a work in progress - photos coming soon - - - - - - - - - - -

During the creation "mini-unit" you could...
  • build the mobile from the general lesson, adding object(s) to represent each day of creation as you learn about them.  Hang the mobile in your story corner and it can become a story telling tool for you throughout the unit.
  • make a bulletin board display with the title "God's Wonderful World" and adding object(s) each lesson throughout the unit
  • make a window display with the same title, and using window markers or paints to add object(s) each day.  Go ahead and use lots of involvement from the little ones, too!  :-)

Creation - Day 1 and 2 (Light and Darkness, Waters and Sky)

1) Welcome Activity...
          - if you are able to dim the room, do so and then give the children flashlights to explore the room with their lights... ask them what they can see in the darkness, and what they can see in the light?  Can we live in a world that is dark all the time?

2) Songs... Sing the welcome song with the children.   For additional songs. see general lesson on creation.

3) Prayer... pray with the children to begin the lesson. Remember to thank God for the beautiful world that He has made.

4) Theme: Talk to the children about the theme of the unit: God works among his covenant people to prepare the world for the Savior. Hebrews 12:1&2 “Therefore, since we are surrounded by so great a cloud of witnesses, let us… look to Jesus.” Tell them that they are going to hear a Bible Story today that shows how God created a perfect world and placed his people in it. God had a plan for his people before the world was even make.

5) Bible Story: Read "The First Seven Days"  from the Read and Learn Bible (Scholastic).  
  • I suggest reading the same story for all 5 lessons.  As they become familiar with the story, encourage them to "fill in the blanks" as you tell it. 
  • Another idea is to find objects to represent each part of creation, put them in a box, and pass the box around so that each child has an opportunity to choose the representative object(s) for each day as you tell the story.

6) Text: Today’s Text is:
       "And God said, 'Let there be light,' and there was light." Genesis 1:3
The text for the general lesson is:
And God saw everything that he had made and, behold, it was very good.” Genesis 1:31
and you could use this for each separate lesson too, as preschoolers love repetition.  :-)

7) Crafts:
  • Darkness and Light.... fold a sheet of black construction paper so that there is an inner pleat (in thirds, and then the outside thirds in half again... see photos), and glue a piece of white paper into the inside space.  On the outside, print "And God said:" and in the inner space print " 'Let there be light,' and there was light.  Genesis 1:3 "  Show the children how to open the black paper up to reveal the inside, and then have them color the inside with yellow markers, crayons or paints to show the light.
  • Waters and Sky...  give each child a sheet of light blue paper with the title "God separated the waters from the sky."  Give each child some "waves" cut out of various kinds of blue paper, and some cotton balls for clouds.  Show them how the waters need to be glued on the bottom of the paper and the clouds need to be glued near the top.
8) Closing Prayer... Gather the children up around the table or in your circle. If you have time, this is a good opportunity to read the story one more time. Then, close by say the Lord's Prayer together.


9) Going Home: Sing the closing song together. Then, check to see if all the children have collected their crafts and coloring sheets before they go home. Say goodbye and tell them that you enjoyed learning about God together and were happy to have them today! You were, weren’t you?

10) Optional Coloring pages: see general lesson on Creation for additional ideas.


Creation - Day 3 (Land, Seas, Plants)
1) Welcome Activity
  • set out the playdough today with all kinds of plant, flower and tree shapes.  Ask the children how many different kinds of flowers there are and challenge them to make as many different plants as they can think of!
  • take a walk outdoors... see if you can identify all the plants and trees that grow around us!
2) Songs... Sing the welcome song with the children.   For additional songs, see general lesson on creation.

3) Prayer... pray with the children to begin the lesson. Remember to thank God for the beautiful world that He has made.

4) Theme: Talk to the children about the theme of the unit: God works among his covenant people to prepare the world for the Savior. Hebrews 12:1&2 “Therefore, since we are surrounded by so great a cloud of witnesses, let us… look to Jesus.” Tell them that they are going to hear a Bible Story today that shows how God created a perfect world and placed his people in it. God had a plan for his people before the world was even make.


5) Bible Story: Read "The First Seven Days" from the Read and Learn Bible (Scholastic).   See notes under Creation-Day 1&2.

6) Text: Today’s Text is:
           "Then God said, 'Let the land produce... plants and trees..." Genesis 1:11
or you could use the general text:
    “ And God saw everything that he had made and, behold, it was very good.” Genesis 1:31


7) Crafts:
  • Plants We Can Eat Collage... collect grocery store flyers, looking for ones that offer lots of pictures of fruits and veggies.  Try to have enough for at least 1 per child.  Look through a flyer together and ask the children which of the items in the flyer is a plant that God provides for us to eat?  Give each child a large piece of white paper and have them cut out plants we can eat and glue them to the paper.  Use the text and the title "God provides plants for us to Eat".
  • Flowers... there are so many different ways to make flowers, and flowers are such a testament to God's attention to detail and God's way of providing us with a truly beautiful world!  Choose any flower craft you like for today.  Here are a few examples: 
                                    http://www.enchantedlearning.com/crafts/flowers/

  • Leaf Rubbing... if you happen to be teaching this lesson in the fall, collect leaves of various sizes from different trees (or take the children outside on a leaf hunt!).  Show the children how we can copy the leaf by covering it with paper and rubbing it with a crayon.  Encourage the children to cover their paper with colored leaves, and then let them take some real leaves home too.  Use the text as a title.
8) Closing Prayer... Gather the children up around the table or in your circle. If you have time, this is a good opportunity to read the story one more time. Then, close by say the Lord's Prayer together.

9) Going Home: Sing the closing song together. Then, check to see if all the children have collected their crafts and coloring sheets before they go home. Say goodbye and tell them that you enjoyed learning about God together and were happy to have them today! You were, weren’t you?

10) Optional Coloring pages... see general creation lesson


Creation - Day 4 (Sun, Moon and Stars)
 
1) Welcome Activity...
  • if you have access to a model kit of the planets, bring that in for today.  Show the children the marvelous variety that God created in the universe.
2) Songs... Sing the welcome song with the children. For additional songs, see general lesson on creation.

3) Prayer... pray with the children to begin the lesson. Remember to thank God for the beautiful world that He has made.

4) Theme: Talk to the children about the theme of the unit: God works among his covenant people to prepare the world for the Savior. Hebrews 12:1&2 “Therefore, since we are surrounded by so great a cloud of witnesses, let us… look to Jesus.” Tell them that they are going to hear a Bible Story today that shows how God created a perfect world and placed his people in it. God had a plan for his people before the world was even make.

5) Bible Story: Read "The First Seven Days"  from the Read and Learn Bible (Scholastic).

6) Text: Today’s Text is:

“ And God saw everything that he had made and, behold, it was very good.” Genesis 1:31

7) Craft:
  • Space Necklace... cut out stars, moons (full/crescent) and planets from heavy cardstock or craft foam and have the children string them on yarn or lacing, separating each shapes with beads (or pasta noodles) so that you can see the shapes.  Make the necklaces long enough that the kids can easily loop them off and on by themselves.
  • Space Sponge Painting... provide each child with a large piece of black construction paper for the night sky.  Set out finger paints in yellow, white, red and blue.  Cut out sponges for form stars, circles (for moon/planets) and crescents (for the moon) and place the sponges in the corresponding color paints.  You may want to attach a clothespin to the top of the sponges to keep little fingers out of the paint.  Encourage the children to fill the night sky with the moon, stars and planets.

8) Closing Prayer... Gather the children up around the table or in your circle. If you have time, this is a good opportunity to read the story one more time. Then, close by say the Lord's Prayer together.

9) Going Home: Sing the closing song together. Then, check to see if all the children have collected their crafts and coloring sheets before they go home. Say goodbye and tell them that you enjoyed learning about God together and were happy to have them today! You were, weren’t you?

10) Optional Coloring Pages... see general  lesson on creation


Creation - Day 5 (Fish and Birds)
 
1) Welcome Activity
  • Felt board.... cut out a wavy shape from blue felt to mark the middle of the felt board so that there is a sky and a sea.  Provide the children with felt animals, birds and fish and let them explore.  Where do the birds go?  Where do the fish go? 

2) Songs... Sing the welcome song with the children.   For additional songs, see general lesson on creation.

3) Prayer... pray with the children to begin the lesson. Remember to thank God for the beautiful world that He has made. Thank God for the marvelous way our bodies are created!

4) Theme: Talk to the children about the theme of the unit: God works among his covenant people to prepare the world for the Savior. Hebrews 12:1&2 “Therefore, since we are surrounded by so great a cloud of witnesses, let us… look to Jesus.” Tell them that they are going to hear a Bible Story today that shows how God created a perfect world and placed his people in it. God had a plan for his people before the world was even make.

5) Bible Story: Read "The First Seven Days" , pages 3-8 (R 8-13) from the Read and Learn Bible (Scholastic).

6) Text: Today’s Text is:

“ And God saw everything that he had made and, behold, it was very good.” Genesis 1:31


7) Craft:
  • Paper Plate Fish... cut out a wedge shape from a paper plate to form a mouth; staple/glue a crescent shape cut from heavy paper to the other end for a tail; you can add triangular fins, too, if you like.  Have the children paint, color or decorate their fish.  Glue on a googly eye.
  • Rainbow Fish.... cut out a simple fish shape from a sheet of construction paper saving the intact outside of the paper and discarding the inside fish shape.  Flip the paper over and give the children lots of long strips of colored tissue paper.  "Paint" the outside edge of the fish with white glue and place the strips of tissue paper over the fish shape so that the tissue paper glues to each side.  Repeat with as many strips of tissue paper as you need to completely cover up the shape.  Let dry and trim off any tissue paper that is visible when you turn the paper right side up again.  Your fish shape will be filled with a rainbow of colors.  These look wonderful hung in a window!
  • Feather Bird... cut out a generic shaped bird from heavy cardstock in a variety of colors.  Before the lesson, make enough "feet" from twists of orange pipe cleaner so that there are two feet for each bird.  Allow the children to choose a bird, decorate it with feathers, glue on a googly eye and tape pipecleaner feet at the bottom.
  • Sticker Picture... give each child a sheet of light blue construction paper with a wave pattern drawn on the bottom half.  Provide the children with lots of bird and fish stickers and have them decorate the top half of the page (the sky) with birds and the bottom half of the page (the ocean) with the fish.

8) Closing Prayer... Gather the children up around the table or in your circle. If you have time, this is a good opportunity to read the story one more time. Then, close by say the Lord's Prayer together.

9) Going Home: Sing the closing song together. Then, check to see if all the children have collected their crafts and coloring sheets before they go home. Say goodbye and tell them that you enjoyed learning about God together and were happy to have them today! You were, weren’t you?

10) Optional Coloring Pages ... see general lesson on creation


Creation - Day 6 and 7 (Animals, Man and God rested)

1) Welcome Activity
  • multicultural people... if you have invested in a set of multi-cultural dolls, today is a perfect time to bring them out.  Talk about how they are the same and how they are different.
  • Toy animals... a bucket of plastic animals is a great intro to today's lesson, too.
2) Songs... Sing the welcome song with the children.   For additional songs, see general lesson on creation.

3) Prayer... pray with the children to begin the lesson. Remember to thank God for the beautiful world that He has made. Thank God for the marvelous way our bodies are created!

4) Theme: Talk to the children about the theme of the unit: God works among his covenant people to prepare the world for the Savior. Hebrews 12:1&2 “Therefore, since we are surrounded by so great a cloud of witnesses, let us… look to Jesus.” Tell them that they are going to hear a Bible Story today that shows how God created a perfect world and placed his people in it. God had a plan for his people before the world was even make.

5) Bible Story: Read "The First Seven Days"  from the Read and Learn Bible (Scholastic).

6) Text: Today’s Text is:
“ And God saw everything that he had made and, behold, it was very good.” Genesis 1:31

7) Craft:
  • God made Me pictures... see general lesson
  • God made Me puppets... see general lesson
  • Animal sticker picture
  • Toilet Paper Roll Animals... this is best for an older group

8) Closing Prayer... Gather the children up around the table or in your circle. If you have time, this is a good opportunity to read the story one more time. Then, close by say the Lord's Prayer together.


9) Going Home: Sing the closing song together. Then, check to see if all the children have collected their crafts and coloring sheets before they go home. Say goodbye and tell them that you enjoyed learning about God together and were happy to have them today! You were, weren’t you?

10) Optional Coloring pages... see general lesson on creation