Three New Psalms Lessons Just Added!
The Psalms unit is now 15 lessons instead of 12. Please feel free to comment on the lessons as you use them so that we can use that feedback to make improvements. :-)


Showing posts with label Old Testament 6-10. Show all posts

Wednesday, April 22, 2009

Unit 1: Lesson 10 MOSES (and the 10 plagues)

1) Welcome Activity:
  • Animals...set out some of the animals involved with the plagues: plastic animals, and finger puppets all work here.
  • Felt board... set out all the pieces involved in the Bible stories of Moses and allow the children to use the pieces to retell the story in their own words and explore what might happen next.

2) Songs: Start the Story Hour with the learning our names song. Go around the circle or table and introduce each child.

Here is a simple song to reinforce the story today: sung to the tune of "This Old Man"

  • First God sent, Plague number one,Turned the Nile into blood.All the people in Egypt were feeling pretty lowThey told Pharaoh "Let them Go!"
  • Then God sent, Plague number two, Jumping frogs all over you.All the people in Egypt were feeling pretty lowThey told Pharaoh "Let them Go!
  • Then God sent, Plague number three, Swarms of gnats from head to knee.All the people in Egypt were feeling pretty lowThey told Pharaoh "Let them Go!"
  • Then God sent, Plague number four, Filthy flies need we say more?All the people in Egypt were feeling pretty lowThey told Pharaoh "Let them Go!"
  • Then God sent, Plague number five, All the livestock up and died.All the people in Egypt were feeling pretty lowThey told Pharaoh "Let them Go!"
  • Then God sent,Plague number six,Boils and sores to make you sickAll the people in Egypt were feeling pretty low.They told Pharaoh "Let them Go!"
  • Then God sent, Plague number seven, Hail and lighting down from heaven.All the people in Egypt were feeling pretty lowThey told Pharaoh "Let them Go!"
  • Then God sent, Plague number eight, Locust came and they sure ate.All the people in Egypt were feeling pretty lowThey told Pharaoh "Let them Go!"
  • Then God sent, Plague number nine, Total darkness all the time.All the people in Egypt were feeling pretty lowThey told Pharaoh "Let them Go!"
  • Then God sent, Plague number ten, Pharaoh's son died so he gave in.All the people in Egypt were feeling pretty lowFinally Pharaoh let them go
For credits and to listen to this song, click here: http://www.kidssundayschool.com/Gradeschool/Songs/1song01.php

3) Prayer... Praise God for his power over all creation and every nation!

4) Theme: Remind the children of the theme of the unit: God works among his covenant people to prepare the world for the Savior. Hebrews 12:1&2 “Therefore, since we are surrounded
by so great a cloud of witnesses, let us… look to Jesus.” Tell them that they are going to hear a Bible Story again today that shows how God works through Moses. God shows that he is more powerful than any earthly king, and more wise than any earthly wise man.

5) Bible Story: Today’s Story is about Moses and the 10 plagues. Read pages 86-95 from the Read and Learn Bible (Scholastic).


You can use the Pharaoh, Moses, Aaron and plagues (frog and flies) pieces to help tell the story today.


6) Text: Today’s Text is: These things will happen "so that you may know there is no one like the Lord, our God." Exodus 8:10b

7) Craft:
  • The Ten Plagues (poster)… Before the lesson, take a large sheet of paper for each child and draw lines to divide into 10 even spaces. Write the names of each plague with their numbers in the spaces. Allow the children to draw/color the water into blood, hailstones and darkness. Provide small pictures for the other plagues and assist the children to glue them in the right space and color them. I used the same pictures as for the mini-book. My daughter liked having the book much better and it would be much easier to carry home from church. :-) This would make a good group craft to color together and display on the bulletin board, and you would have time to make a frog to take home! Paint the frogs, do the group poster, and then complete the frogs.
    Reminder: 1) water into blood 2) frogs 3) gnats 4) flies 5) death of all the Egyptians animals 6) sores 7) hailstones 8) locusts 9) darkness 10) death of Egyptian first born.
  • The Ten Plagues (mini-book)... use the link below to find pictures for all 10 plagues. I copied and pasted all of the pictures into a document and reduced them all so that I had 2 pictures on every page, then added the titles underneath. Email me and I can send you the document to save you some work! Cut before the lesson (I used a paper cutter to make quick work of it, cutting each page 5"x7"). During the lesson, have the children find the correct pictures and put them in order. Give them a blank sheet of paper to fold in half for the cover (again, I just cut 5X7 rectangles from construction paper). Staple the pages together and have each child write a big number "10" on the front, then glue/write the text on the front cover.. Some children may want to color the pictures right away and some will enjoy reading it to you, instead.You can do this and one frog craft together.

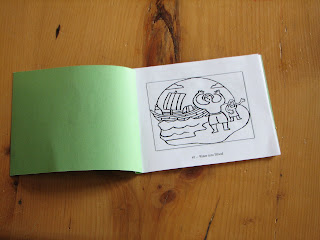
There are pictures of all 10 plagues here: http://coloringbookfun.com/moses/index.htm

  • The plague of frogs (Paper Plate). There are several ways to make really cute frogs and kids like frogs. They may not understand why this is a plague. After you have made the frogs, have the kids use them to imagine frogs in their beds, in their food, everywhere!
    Frog (Paper Plate) Paint a small paper plate green. (Note: I found green paper plates at the local Dollar$ Store) Cut out arms and legs from green paper, and a tongue from red. paper. Cut out eyes from white paper and draw black circles in the center. Have the children glue on the eyes and staple the arms and legs and tongue in place. The frogs are cute just like this, but our kids wanted spots so we glued foam shapes all over them, too. If you have time, you may want to have the kids paint their plates green early on in the session and complete the craft later on.


( I cut all the legs with the same pattern, and then tucked the front legs under the plate a bit further to make them a little shorter. This cut down my "prep" time!)

The completed frog!

  • The Plague of Frogs (Rocks) Collect enough small to medium sized rocks for all the children and paint them green before class. Cut out arms, legs and tongue from construction paper. Attach to green rock with hot glue gun if necessary. Add googly eyes. Set on paper plate with child’s name and text. Again, painting could be done by children if you divide the craft into two work sections.

Experiment with the glue you have available first to see how well the arms, legs and eyes attach as there is nothing so disappointing as a limb-less frog. :-( White glue worked, but my daughter wanted to play with the frog right away. We tried it again with a glue gun and found the results much more satisfying. On the down side, you need to do the gluing yourself.

  • Frog (Paper Bag Puppet)  Cut out smaller arms and longer legs from green construction paper.  Cut out eye shapes and bend at the bottom to make a "tab" for gluing.  Cut out a long strip of red/pink for the tongue and slightly curl the end.  Glue all the pieces to the paper bag and decorate the frog with green crayons/markers or poster paints.  My son used the green paint dabber to add spots instead and was very happy with how "froggy" this looked.    Just FYI... most 5 year olds will be able to assemble this with little assistance if you have a sample available, but 3&4 year olds will need some help.  Make sure that you have all the pieces cut out (and bagged in sets) and have an extra pair of hands around for this craft.


8) Prayer.. say the Lord's prayer together with the children.

9) Going Home: .Sing the closing together. Then, check to see if all the children have collected their crafts and coloring sheets before they go home. Say goodbye and tell them that you enjoyed learning about God together and were happy to have them today! You were, weren’t you?

10) Optional Coloring Page

Here is one option showing Moses and some of the 10 plagues:
http://www.coloring.ws/t.asp?b=m&t=http://www.coloring.ws/bible/exodus8to10.gif

Unit 1: Lesson 9 MOSES (and the burning bush)

1) Welcome Activity

2) Songs: Start the Story Hour with the learning our names song. Go around the circle or table and introduce each child.

(sing to the tune of “The More we get together”
Thank you God for (name)
For (name), for (name)
Thank you God for (name)
We’re glad (s) he is here!

3) Prayer...

4) Theme: Remind the children of the theme of the unit: God works among his covenant people to prepare the world for the Savior. Hebrews 12:1&2 “Therefore, since we are surrounded
by so great a cloud of witnesses, let us… look to Jesus.” Tell them that they are going to hear a Bible Story again today that shows how God works through Moses. God saved Moses from the anger of the Pharaoh when he was a small baby. Even though Moses thought he could NOT lead God’s people to the promised land, God uses Moses’s weaknesses to show God’s strength!

5) Bible Story: Today’s Story is about Moses, focussing on his calling. Read pages 80-85 from the Read and Learn Bible (Scholastic).

6) Text: Today’s Text is: "Say this to the people of Israel, 'I AM has sent me to you.'" Exodus 3:14b


7) Craft:
  • The Burning Bush (fingerpaint)... Print out a picture of Moses and the burning bush. Have the kids color Moses with crayons (not markers). Then, give every two children a small lid with some fingerpaint- a bit of red and a bit of yellow. Show them the bush in the picture and have them paint the red and yellow on the bush to make fire.
Here is a good picture to use. They summarize Exodus 3:14 " I am that I am", which sounds a bit awkward. I would just glue our text over top of that.
http://www.coloring.ws/t.asp?b=m&t=http://www.coloring.ws/bible/exodus3.14.gif

  • The Burning Bush (tissue paper)... Print out a picture of Moses and the burning bush. Have the kids color Moses with crayons (not markers). Then, give each child a variety of thin strips of tissue paper in red and yellow (and orange if you like, although wherever the red and yellow overlap, if will appear orange) and have them glue them on the burning bush. This is best done with white glue in cups with a q-tip as a bit of moisture will allow the colors in the tissue paper to bleed a little. (photo coming soon)

8) Closing Prayer... say the Lord's prayer together with the children

9) Going Home: Sing the closing together. Then, check to see if all the children have collected their crafts and coloring sheets before they go home. Say goodbye and tell them that you enjoyed learning about God together and were happy to have them today! You were, weren’t you?

(sung to the tune of The More we Get Together,
just like the opening song)
We love to learn together,
Together, together
We love to learn together
And give thanks to God.
Also can be sung with: “sing” or “pray” or “work”

10) Optional Coloring Pages:
Lots of nice picture relating to Moses's life can be found here:
http://coloringbookfun.com/moses/index.htm

Unit 1: Lesson 8 MOSES (as a baby)

1) Welcome Activity:

2) Songs: Start the Story Hour with the learning our names song. Go around the circle or table and introduce each child.

(sing to the tune of “The More we get together”
Thank you God for (name)
For (name), for (name)
Thank you God for (name)
We’re glad (s) he is here!

3) Prayer... Thank the Lord today for using our weaknesses for his glory.

4) Theme: Remind the children of the theme of the unit: God works among his covenant people to prepare the world for the Savior. Hebrews 12:1&2 “Therefore, since we are surrounded
by so great a cloud of witnesses, let us… look to Jesus.” Tell them that they are going to hear a Bible Story again today that shows how God works through Moses. God saved Moses from the anger of the Pharaoh when he was a small baby. Even though Moses thought he could NOT lead God’s people to the promised land, God uses Moses’s weaknesses to show God’s strength!.

5) Bible Story: Today’s Story is about Moses. Read pages 77-79 from the Read and Learn Bible (Scholastic). I have divided the story of Moses into several sections. You may choose one section to focus on each year, or you can do all the sections.

6) Text: Today’s Text is: "She named him Moses, saying, 'I drew him out of the water.'" Exodus 2:10b
.
7) Craft:
  • The Baby Moses #1….Cut a square of brown paper for each child. Fold gently lengthwise and staple the ends. Press basket down to make a nice “bottom”. Also, prepare a "baby Moses" for each child. String a large round pink/white/wooden bead onto a pink pipe cleaner so that it is about ½ way. Twist several times to make the neck. With each end of pipe cleaner, form one arm and one leg. Twist two ends together. You may draw a face with a permanent marker if you wish. We have tried to do this with the children, but it's a bit too time consumeing. At craft time, have the children glue a piece of blue tissue paper on a small paper plate to make the "river". Attach the basket to the river with a brad. Give each child a "baby" a cotton ball for a pillow and a scrap of fabric for a blanket and let them tuck the baby into the basket and float it in the river. This craft does require some extra preparation, but the results are well worth it!
  • The Baby Moses #2: Print out the template pieces and cut them all out ahead of time. Then, have the childen assemble the picture like a puzzle and glue them on to a sheet of blue construction paper. The picture can then be colored, if you like.


  • The Baby Moses #3: Print out the baby Moses template and cut out one for each child. Cut two "baskets" out of brown constuction paper and use a hole punch to make holes along the edge. Have the children lace the two sides of the baskets together with brown yarn, looping the end of the string around to make a handle. Color the baby and put him in the basket.
Template can be found here: http://www.daniellesplace.com/html/Bible%20Themes%20-%20Moses.html

* turns out this lacing is a bit difficult for 3 and 4 year olds. To make it easier, reduce the number of holes. You could also cut the yarn and stiffen one end with white glue ahead of time to make it a bit easier to poke through!


8) Closing Prayer... say the Lord's prayer together with the children

9) Going Home: Sing the closing together. Then, check to see if all the children have collected their crafts and coloring sheets before they go home. Say goodbye and tell them that you enjoyed learning about God together and were happy to have them today! You were, weren’t you?
(sung to the tune of The More we Get Together, just like the opening song)
We love to learn together,
Together, together
We love to learn together
And give thanks to God.
Also can be sung with: “sing” or “pray” or “work”


10) Optional coloring pages:
Here is a good one to use today:
http://www.coloring.ws/t.asp?b=m&t=http://www.coloring.ws/bible/babymoses.gif
Lots of good coloring pages about Moses's life can be found here:
http://coloringbookfun.com/moses/index.htm
More baby Moses:
http://www.coloringpages.net/pages/bible-24.html
http://www.coloringpages.net/pages/bible-37.html

Tuesday, April 7, 2009

Unit 1: Lesson 7 JOSEPH

1) Welcome

2) Songs: Start the Story Hour with the learning our names song. Go around the circle or table and introduce each child.

(sing to the tune of “The More we get together”)
Thank you God for (name)
For (name), for (name)
Thank you God for (name)
We’re glad (s) he is here!

3) Prayer... Thank God that he is in control of everything. Thank him for guiding our way.

4) Theme: Remind the children of the theme of the unit, that God works among his covenant people to prepare the world for the Savior. Hebrews 12:1&2 “Therefore, since we are surrounded by so great a cloud of witnesses, let us… look to Jesus.” Tell them that they are going to hear a Bible Story again today that shows that theme. Joseph’s brothers were doing wrong to Joseph by selling him into slavery, but God had a plan to save all the Israelite from the famine using Joseph in Egypt.

5) Bible Story: Today’s Story is about Joseph based on Genesis 37-45. Read pages 65-76 from the Read and Learn Bible (Scholastic).

6) Text: Today’s Text is: Genesis 45:8 “So it was not you who sent me here, but God.”

7) Craft:

  • Joseph’s Many Colored Coat… cut out the shape of a coat from construction paper. Give the children crayons/markers and colored paper scraps, scissors and glue and encourage them to decorate Joseph’s coat in many colors. They may glue the finished coat onto a sheet of white paper with the text on the bottom or you can simple write the text on the back of the coat. Materials Required: construction paper, bag of colored scraps. white paper, crayons, markers, glue. Alternatively, provide them with a coloring page of Joseph and have them decorate this coat with all the colored scraps.
  • This picture is good for smaller kids at the coat already has lots of pattern. This removes the pressure to cover the whole coat with colors! A simpler picture may work better if your group has more older children who might like to make up their own patterned coats.
  • Joseph's Coat (painting)... if you have invested in paint dabbers (see tip on "Noah"), then this would be a great time to bring them out. Let the children fill in the coat with lots of dabs of paint in many different colors. Kids can easily get carried away with paint dabbers, so emphasize that the paint is supposed to go ONLY on his coat!
  • The COAT on the left is just squares of construction paper. If you have fabric scraps, that can look really good too. The COAT on the right is painted with paint dabbers - by my 3 year old... I did the coloring, though :-)
  • Joseph’s Dreams… draw a line down the center of a piece of construction paper to divide the paper into two. Cut out the shapes: a person for Joseph, sheaves of wheat, the sun, moons and stars. Allow the children to choose and glue the shapes to show Joseph’s two dreams. You may want to prepare a sample for them to copy. If you can find them, use start stickers instead of paper cut outs. Older children may want to draw Joseph rather than glue on the paper person. Materials Required: construction paper, Joseph cut out shapes, star stickers, sun and moon cut out shapes, glue, crayons, markers (photos coming soon)
8) Closing Prayer: say the Lord's Prayer together with the children.

9) Going Home: Sing the closing together. Then, check to see if all the children have collected their crafts and coloring sheets before they go home. Say goodbye and tell them that you enjoyed learning about God together and were happy to have them today! You were, weren’t you?
(sung to the tune of The More we Get Together,
just like the opening song)
We love to learn together,
Together, together
We love to learn together
And give thanks to God.
Also can be sung with: “sing” or “pray” or “work”

Unit 1: Lesson 6 JACOB AND ESAU

1) Welcome:
2) Songs: Start the Story Hour with the learning our names song. Go around the circle or table and introduce each child.

If you are the musical type, you may want to learn this song and teach it to the children! Click here to listen. The full lyrics and score are available at http://www.gardenofpraise.com/
http://gardenofpraise.com/audiofiles/jacosong-1.wma
Here is a neat song to help us learn the names of Jacob's sons:

Sons of Jacob (to the tune of "Ten Little Indians")
Reuben, Simeon, Levi, Judah,
Issachar, Zebulun, Dan and Naphtali,
Gad and Asher, Joseph, Benjamin
- These are the sons of Jacob.

3) Prayer: Ask God to use our weaknesses to show how strong HE is!

4) Theme: Remind the children of the theme of the unit: God works among his covenant people to prepare the world for the Savior. Hebrews 12:1&2 “Therefore, since we are surrounded by so great a cloud of witnesses, let us… look to Jesus.” Tell them that they are going to hear a Bible Story again today that shows how God works through two brothers, Jacob and Esau. God uses the brother’s strengths as well as their weaknesses to show God’s power and might.

5) Bible Story: Today’s Story is about Jacob and Esau. Read pages 50-62 from the Read and Learn Bible (Scholastic).

6) Text: Today’s Text is: The Lord said to Rebekah, “and two peoples, born of you, shall be divided; The one shall be stronger than the other, The elder shall serve the younger.” Genesis 25:23

7) Craft:
Birthright Sold for a bowl of Soup- Clay Craft. Prepare “air dry” clay ahead of time, if you wish, or use plasticine. Make enough so that each child can make a small pot. Bring a small round cup and a rolling pin to cut out standard size bases for all the pots. You may wish to prepare a sample a few days ahead of time. At craft time, help the children roll a flat section and cut out bases for each child. Divide remaining dough into even lumps for each child and demonstrate how to roll a “snake” in your hands. Coil the length of clay around the base of the pot to make an old fashioned soup pot. Clay will dry after it has gone home. Send home “pots” in a Styrofoam bowl/plate with today’s text attached to it. If you like, you could even give the children some red lentils to put in their pots! We have tried this with a variety of different "clays" and find that plasticine (even the inexpensive kind that you can buy at a dollar store) is the easiest for kids to work with and provides the most satisfying results.

  • Same and Different….cut out the shape of a man (2 for each child and have them glue one one side of a piece of construction paper. Have the children decorate the shapes with crayons, markers and scraps of fabric to show how the two brothers are same and different. Provide scraps of fake fur if possible! Write “Esau” and “Jacob” on the two sides of each child’s sheet. If you have time, also write down a few words to describe each brother using the child’s ideas.


8) Closing Prayer: say the Lord's Prayer together with the children.

9) Going Home: Sing the closing together. Then, check to see if all the children have collected their crafts and coloring sheets before they go home. Say goodbye and tell them that you enjoyed learning about God together and were happy to have them today! You were, weren’t you?
Closing song:
(sung to the tune of The More we Get Together,
just like the opening song)

We love to learn together,
Together, together
We love to learn together
And give thanks to God.

Also can be sung with: “sing” or “pray” or “work”

10) Optional Coloring Pages (available for free at http://www.dltk-bible.com/)