Three New Psalms Lessons Just Added!
The Psalms unit is now 15 lessons instead of 12. Please feel free to comment on the lessons as you use them so that we can use that feedback to make improvements. :-)


Showing posts with label New Testament 16-20. Show all posts

Thursday, May 21, 2009

Unit 2: Lesson 20 PENTACOST

1) Welcome Activity:

2) Songs: Start the Story Hour with the learning our names song. Go around the circle or table and introduce each child.

Here is a nice song to sing today: Wind and Fire (to the tune of Frere Jacque)
Tongues of fire; tongues of fire;
Mighty wind; mighty wind:
The Holy Ghost is coming; the Holy Ghost is coming;
Praise the Lord! Praise the Lord!
3) Prayer... thank the Holy Spirit for living in our hearts

4) Theme: Remind the children of the theme of the unit: God sends his greatest gift, Jesus Christ our Saviour. John 1:14 “we beheld his glory, glory as of the only Son from the Father”
Tell them that they are going to hear a Bible Story again today that shows the glory of God through the Holy Spirit dwelling in us.

5) Bible Story: Today’s Story is about Pentacost, when God sent his Holy Spirit to his people to be their comforter and guide. Read pages 452-465 from the Read and Learn Bible (Scholastic).

6) Text: Today’s Text is: “God says, ‘I will pour out my Spirit on all people.’” Acts 2:17a

7) Crafts:

  • Flame Headbands… use a large poster board to cut strips to make head bands. Measure for each child’s head and staple closed. Cut out red/orange or yellow flames to glue to the front of the headbands.
  • Dove… the dove often symbolizes the Holy Spirit. Before the class, cut out wing, tails and heads for each child. Have the children color the beak and glue the pieces onto a toilet paper roll to make a dove. If your rolls are not white, you can have the children glue on a square of white paper first or you can paint the rolls white at home before the lesson. See template for shapes:
  • http://www.dltk-bible.com/t.asp?b=m&t=http://www.dltk-bible.com/animals/bdove.gif


8) Closing Prayer... say the Lord's Prayer together with the children
9) Going Home: Sing the closing together. Then, check to see if all the children have collected their crafts and coloring sheets before they go home. Say goodbye and tell them that you enjoyed learning about God together and were happy to have them today! You were, weren’t you?
10) Optional Coloring Pages:
Several useful pages here: http://www.coloring.ws/pentecost.htm
12 disciples at pentacost: http://www.christianpreschoolprintables.com/ColoringPage12Disciples.html

Unit 2: Lesson 19 ASCENSION

1) Welcome Activity:

2) Songs: Start the Story Hour with the learning our names song. Go around the circle or table and introduce each child.

3) Prayer... give glory to God who is in heaven.

4) Theme: Remind the children of the theme of the unit: God sends his greatest gift, Jesus Christ our Saviour. John 1:14 “we beheld his glory, glory as of the only Son from the Father”
Tell them that they are going to hear a Bible Story again today that shows the glory of God as Jesus rose up into heaven to sit at his Father’s right hand.

5) Bible Story: Today’s Story is about the ascension of Jesus into heaven after he rose from the dead. Read pages 447-451 from the Read and Learn Bible (Scholastic).

6) Text: Today’s Text is: “He was taken up before their very eyes, and a cloud hid him from their sight.” Acts 1: 9

7) Craft:
  • A cloud hid him from their sight… Use the picture of Jesus ascending and have the children color the picture. Cut out a large cloud shape from construction paper and attach it with a brad and have the children glue some cotton on the cloud . That way you can really move the cloud to "hide" Jesus from their sight.
    Cloud "hiding" Jesus
the cloud in the sky

8) Closing Prayer... say the Lord's Prayer together with the children

9) Going Home: . Sing the closing together. Then, check to see if all the children have collected their crafts and coloring sheets before they go home. Say goodbye and tell them that you enjoyed learning about God together and were happy to have them today! You were, weren’t you?

10) Optional Coloring Pages:
Jesus ascending while disciples watch: http://www.bible-printables.com/Coloring-Pages/Easter/10-easter-019.htm

Tuesday, May 19, 2009

Unit 2: Lesson 18 CHRIST HAS RISEN

1) Welcome Activity:


2) Songs: Start the Story Hour with the learning our names song. Go around the circle or table and introduce each child.

3) Prayer... praise God for his amazing work of salvation!


4) Theme: Remind the children of the theme of the unit: God sends his greatest gift, Jesus Christ our Saviour. John 1:14 “we beheld his glory, glory as of the only Son from the Father”
Tell them that they are going to hear a Bible Story again today that shows the glory of God through the resurrection of his son. Jesus died. But that was not the end of the story. After three days, God raised him from the dead!


5) Bible Story: Today’s Story is about the Resurrection of Christ. Read pages 435-446 from the Read and Learn Bible (Scholastic).


6) Text: Today’s Text is: “He is not here; he has risen!” Luke 24: 6a


7) Craft:

  • EASTER SPICES Cut a cross from sandpaper. Punch a hole in the top of the cross and string a length of ribbon through it to make a hanger. Explain that when the women went to the tomb they took sweet smelling spices to put on Jesus' body. Remind the children that when the women got to the tomb they discovered that Jesus had risen from the dead. Color the crosses and then decorate them with glitter glue and then help them sprinkle spices such as nutmeg, cinnamon, allspice, etc. on the wet glue.
  • Jesus Is Alive Cross!
    You'll need:card stock,decorating tools (crayons,paints,markers...)
    Directions:On a piece of card stock make a cross to cover most of the page. Using another piece of cardstock, make a smaller cross that can fit into the larger cross. On the smaller cross write the scripture "JESUS IS ALIVE! Luke 24:23". Tape the large cross on a piece of card stock. Have the children decorate the paper...doesn't matter if they get the paint, crayon or marker on the cross. After the children are done decorating, take the cross off of the card stock. Glue the smaller cross in the middle of the space left on the cardstock when you removed the large cross.Other ideas: ,- you can cut around the cross,- put a magnet on the back to hang it on the refridgerator,- hole punch a hole on the top, tread string through the hole and hang on a door knob (or wherever),After the paint dries, tell the children that the paint on the cross represents our sin (our bad choices), but when Christ died on the cross, he died so that our sins could be forgiven. At this point, peel the cross off the page to reveal the white card stock ( the undecorated under the cross) and say...Now we are as white as snow. Our sins are forgiven. Jesus died to take away our sins.
  • "He Lives!" Easter Wreath
    You'll need:paper plate,construction paper,stapler,glue,markers,hole punch,yarn
    Directions:Ahead of time: Cut out the center of the paper plate. The outside of ring of the plate will be used as the wreath base. Have the child cut several spring flowers out of construction paper (Easter lillies, tulips). If the children are young - you can cut several flowers out ahead of time. Make several leaves to add to the wreath. Now glue the flowers and leaves all around the wreath base. Cut a 2"x5" banner out of yellow construction paper and write "He Lives!" on it with marker. Glue this to the bottom of the wreath. Punch a hole at the top of the wreath, and add a loop of yarn for the hanger.
  • Easter Lilies: These lilies are made from a child's handprint (on paper) stapled to a straw. You can make an entire bouquet of flowers for a great gift or Spring decoration.
    Supplies needed: Construction paper, Pencil, Scissors Green pipe cleaners (or straws), Tape or glue, Stapler. Trace a child's hand on construction paper. Cut the tracing out.
    Curl each of the fingers around a pencil. Using the palm of the handprint, form a cone (with the fingers curling outwards). Glue or tape the cone together. Staple the flower to a pipe cleaner or a drinking straw. Draw some leaves on green construction paper, then cut them out. Staple or tape the leaves to the straw. Make a few of these flowers for a beautiful bouquet.
  • Stained Glass Window: Cut out cross shapes in the inside of a piece of construction paper, leaving the outside edge intact.  Provide the children with lots of strips of colored tissue paper.  Use a big paint brush to apply white glue around the outside edges of the cross and show the children how to lay the strips across in order to fill in the entire space.  Allow to dry, trim the edges of tissue paper that extend beyond the construction paper and hang on the window in your classroom to display them.

8) Closing Prayer... say the Lord's Prayer together with the children

9) Going Home: Round the children up again and sing the closing song together. Check to see if all the children have collected their crafts and coloring sheets before they go home. Say goodbye and tell them that you enjoyed learning about God together and were happy to have them today! You were, weren’t you?

10) Optional Coloring Pages:

Unit 2: Lesson 17 JESUS DIES FOR OUR SINS

1) Welcome Activity:


2) Songs: Start the Story Hour with the learning our names song. Go around the circle or table and introduce each child.


3) Prayer... praise God for sending his Son to die on the cross to pay our debt.


4) Theme: Remind the children of the theme of the unit: God sends his greatest gift, Jesus Christ our Saviour. John 1:14 “we beheld his glory, glory as of the only Son from the Father”
Tell them that they are going to hear a Bible Story again today that shows the glory of God in the death of his Son. God loves us so much that he gave up his only begotten son so that we might live forever more. Glory be to God!


5) Bible Story: Today’s Story is about Jesus dying for our sins. Read pages 430-434 from the Read and Learn Bible (Scholastic).


6) Text: Today’s Text is: “Jesus called out with a loud voice, ’Father into your hands I commit my spirit.’” Luke 22:46a


7) Craft:

  • Sun-catcher Cross
    You'll need:construction paper,tissue paper (multiple colors),glue,scissors,paintbrush and paper cup (optional)
    Directions:Even very small children are able to do much of this craft themselves. Cut a cross shape out of the center of the construction paper. Don't cut through any of the paper surrounding the cross shape. spread glue on one side of the paper (or dilute glue with water and allow kids to paint it on). Cut long, narrow strips of tissue paper in various colors and have kids place across the cross-shaped opening. Overlapping and changing direction of the tissue paper adds to the beauty and individuality of the cross. When done, trim tissue from edges of paper or you may glue another piece of paper with an identical cross shaped opening on the back, sandwiching the tissue paper between two pieces of paper, and revealing the colored tissue paper. These are lovely hung in a window.
  • Contact Paper Cross… Cut two same sized squares of clear contact paper (available in rolls at most dollar stores) for each child. Peel the backing off one sheet and allow the child to “decorate” it by sprinkling on various colors of glitter or small confetti. Peel the backing off the other sheet of contact paper and lay it overtop of the decorated side. Cut out the shape of a cross if you like. Punch a hole in the top and add a loop of string so it can be hung on a window.

8) Closing Prayer... say the Lord's prayer together with the children

9) Going Home: Sing the closing together. Then, check to see if all the children have collected their crafts and coloring sheets before they go home. Say goodbye and tell them that you enjoyed learning about God together and were happy to have them today! You were, weren’t you?

10) Optional Coloring Pages:
simple cross with flowers on it:
http://www.coloring.ws/t.asp?b=m&t=http://www.coloring.ws/bible/cross.gif

Unit 2: Lesson 16 LORD's SUPPER

1) Welcome Activity: 
  • if you have play dishes and food in your room these are perfect for today (if not, see if you can bring some in for the day...)  Let the children set the table with all their favorite things to eat!
2) Songs: Start the Story Hour with the learning our names song. Go around the circle or table and introduce each child.

3) Prayer... Thank God for the Lord's Supper which reminds us of Jesus' great gift to us.

4) Theme: Remind the children of the theme of the unit: God sends his greatest gift, Jesus Christ our Saviour. John 1:14 “we beheld his glory, glory as of the only Son from the Father”
Tell them that they are going to hear a Bible Story again today that shows the glory of God when Jesus instructs his people to remember his great sacrifice through the celebration of the Lord’s Supper. Remind the children of their own experiences witnessing the Lord’s Supper in church.

5) Bible Story: Today’s Story is about the Last Supper where Christ institutes the Lord’s Supper with his disciples with instructions to do this in remembrance. Read pages 420- 429 from the Read and Learn Bible (Scholastic).

6) Text: Today’s Text is: “Do this in remembrance of Me.” Luke 22:19b
7) Craft:

  • Sponge Painting… provide the children with red/purple paint for the wine and brown/white for the bread and let them paint with sponges (clip clothespins on one side to keep little fingers out of the paint. Before the painting, you may want to have them color the cup with markers or metallic colored crayons.
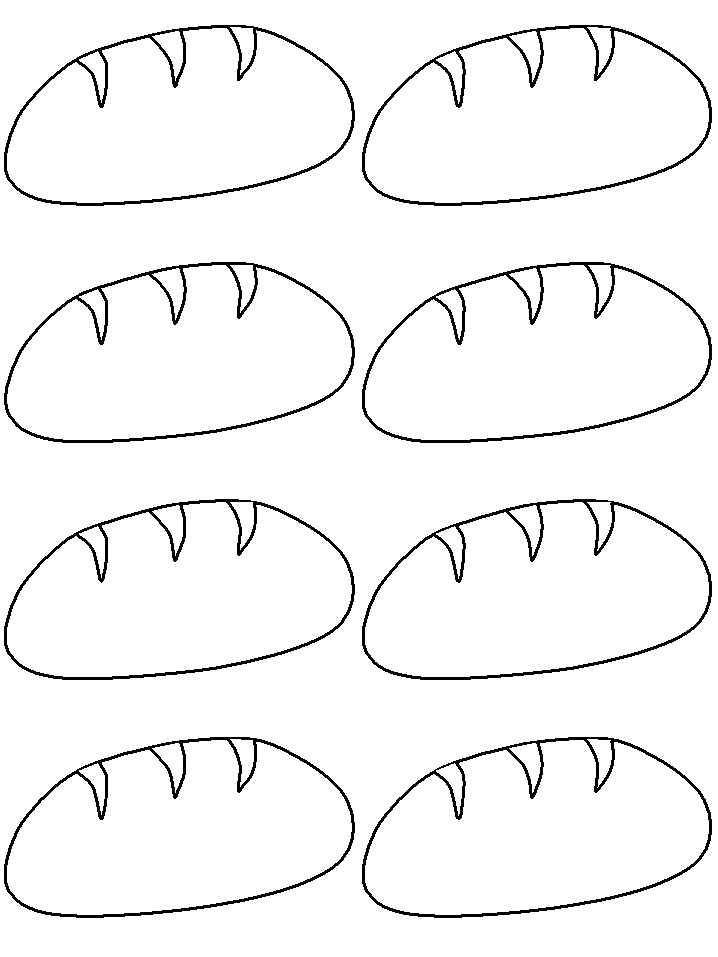
  • Bread Book… provide each child with six “slices” of bread. Color the picture on each and put them in order. Staple twice on one side to make a book about the Lord’s Supper. (sorry, this template is no longer on line... I'm working to make my own version for you to copy!)
  • Bread and Wine... use simple templates or draw your own glass and loaf of bread.  Use torn paper in various shades of brown to fill in the loaf of bread, and crumbled tissue paper in red/purple to fill in the wine glass.  Glue the text to the bottom - a simple craft that the children really enjoy doing!

8) Closing Prayer... say the Lord's prayer together with the children

9) Going Home: Round up all the children around the table or sit in a circle again. Sing the closing together. Then, check to see if all the children have collected their crafts and coloring sheets before they go home. Say goodbye and tell them that you enjoyed learning about God together and were happy to have them today! You were, weren’t you?

10) Optional Coloring Pages:

The last supper: http://www.calvarywilliamsport.com/e2.htm

The last supper: http://www.sermons4kids.com/last-supper-colorpg.htm
slice of bread template for making your own book about the Lord's Supper: http://www.eduplace.com/rdg/hme/k_5/shapebook/pdf/breadwol.pdf
or mini loaves: http://www.dltk-holidays.com/p.asp?b=m&p=http://www.dltk-holidays.com/easter/images/bloaves.gif
Jesus is the bread of Life: http://www.coloring.ws/t.asp?b=m&t=http://www.coloring.ws/bible/jesus/breadoflife.gif